
I'm not saying this is the easiest way, but it is a very cool way to make an outstanding nickel.
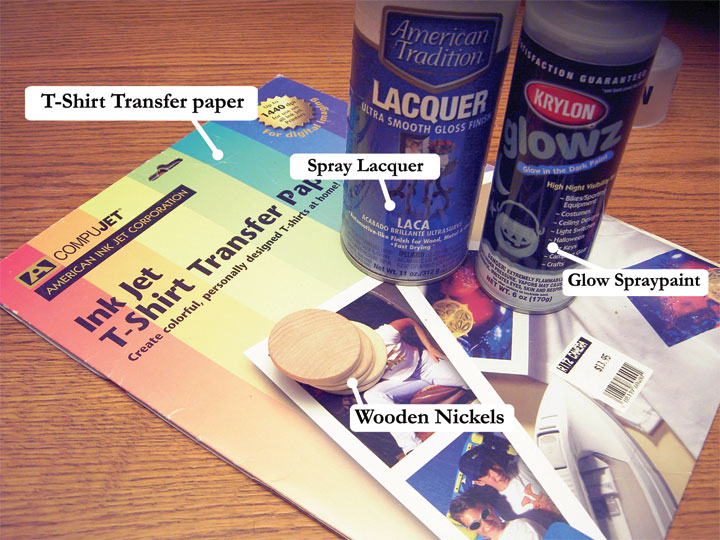
First you need to get your supplies. Here is the list:
1 can Glow-in-the-dark spraypaint. $3-$5
1 can glossy spray lacquer
28 count bag of wooden nickels. I got mine from Michaels (Craft stores carry these)
1-2 sheets of inkjet T-Shirt iron-on paper
Some napkins or paper towels
a 2'X2' (aprox) piece of wax paper
*optional* 1 new unused travel bug dog tag
You need the use of a hair straitening iron (I stole my wife's :)
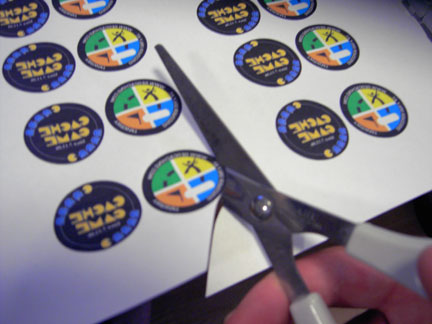
Now that you have the supplies you need to go to your computer and do a design. Because the coin glows you need to make the picture on the coin smaller than the coin so some of the glow can come through. My wooden nickels were 1.5" so I made the transfer 1" I suggest using Adobe Photoshop to do the design, but I know there are other graphics programs out there.
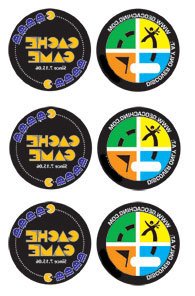
The key to printing transfers is that you reverse the design so it is backwards. Otherwise when you transfer the image it will be backwards!
Next, do a good job of cutting. Because it's transfer paper any part left untrimmed will be a white color.
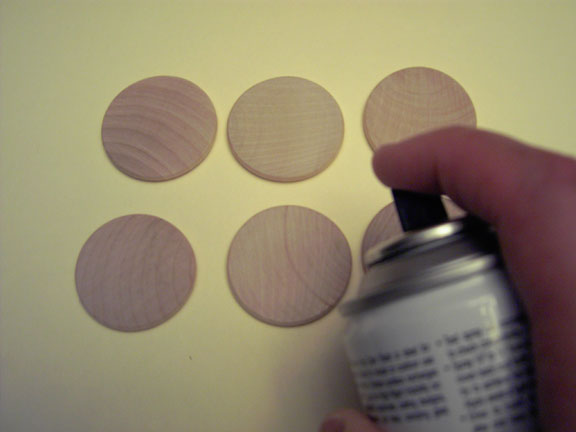
Now it's time to paint the nickels with the glowing spraypaint. Apply the paint to the number of nickels you desire. I suggest to spray as many as you can. Allow several hours to dry.
Once the paint is dry and the nickel transfers are cut out and ready, heat up the iron and grab some napkins or paper towels*.
*The napkins/paper towels are needed to sandwich the nickel in. Otherwise the glow paint gets too hot and bubbles up.
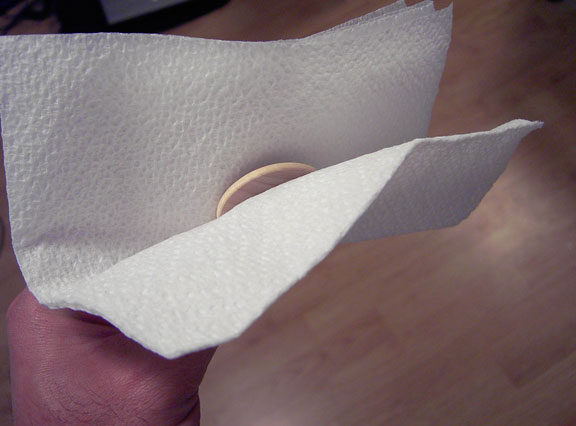
Take a front and back transfer and place it where it goes on the nickel. Sandwich it with the napkin/paper towel and place it in the iron. I suggest that the iron be on medium heat.
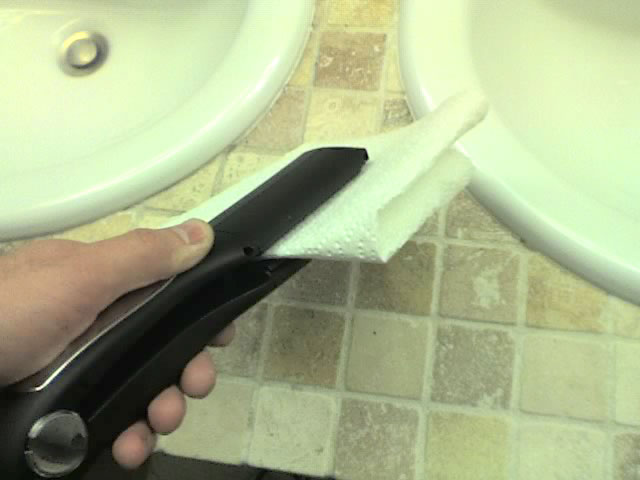
The whole heating process will take about 45 seconds to a minute. To much will damage the paint. Once the time has passed take the sandwiched nickel out of the iron and continue to press and hold the nickel. This allows for optimum adhesion of the transfer.
Repeat this process until all the nickels are done.
The final step is spraying them with lacquer. This will give them that extra gloss that will make people go, damn... nice nickels.
Allow the lacquer to dry for several hours before turning them and doing the back side. I would suggest that you spray them on wax paper. This will keep the lacquer from sticking the nickels to the bottom surface.
Once the back side is done some people will call it good, but I did the process two more times. (But I'm a freak ;)
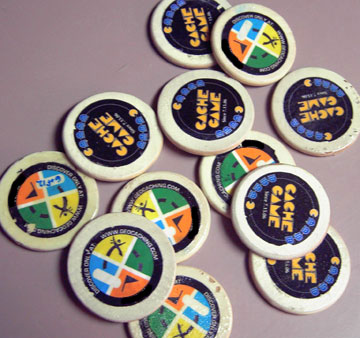
The finished product:
I added an area that I could mark the series number of the nickel on as well as a travel bug tag number so I could track these from cache to cache *This is not technically working within the groundspeak rules... do at your own risk of losing your tag number.
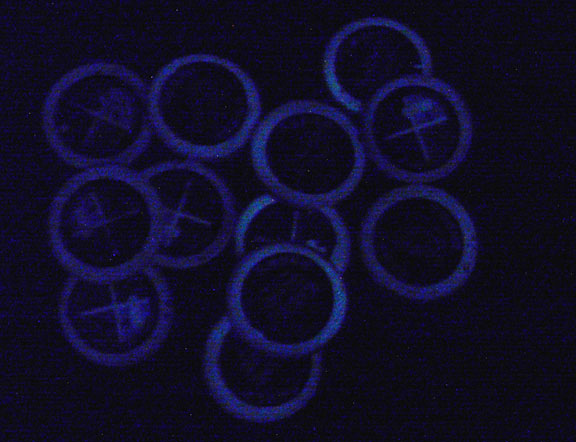
Now, turn off the lights!!!!


1 comment:
Thanks for the tip. Really cool!!!
Post a Comment